Blur Shader with cocos2d v2.0
Blur Shader with cocos2d v2.0 and CCSpriteBatchNode
Near the end of the first feature pass on Trisector, I still had about 7ms CPU and GPU per frame available, so I decided to add a slight blur to the background layer to enhance the depth of field. This article will describe the Blur Shader used for the background layer in Trisector.
Applying a simple Blur Shader to a background layer (a CCSpriteBatchNode in Cocos2d v2.0) turned out to be much more work and testing than I anticipated.
I have immediate access to an iPhone 5 (iPhone5,1) and an iPad Mini (iPad2,5). My early Blur Shader code worked just fine on both of these devices, but the first generation retina iPad (iPad3,1+) of one of my testers proved to be a challenge.
On my iPad Mini, I had a box style blur shader that sampled 4 neighboring points working pretty quickly. However, the Blur Shader did not result in a steady 60fps on the iPad3. To further complicate the shader code, my tile texture sheet had a lot of transparency, so needed to ensure that the blur for a transparent pixel didn’t add any visual artifacts.
To add the Blur Shader to the CCSpriteBatchNode, I first needed to define and load it to the shader cache, and then apply the shader to the layer:
// define/load the BlurShader
addShader();

// apply BlurShader to the layer
layer.shaderProgram = [[CCShaderCache sharedShaderCache] programForKey:@"BlurShader"];
Here is how the Blur Shader is setup, and how the specific vertex and fragment shaders are defined. This Blur Shader is based on the built in Cocos2D shaders such as kCCShader_PositionTextureColor:
// this function resides in a c style function lib
void addShader(){

    // define the default shader program
    CCGLProgram *shaderProgram = [[CCGLProgram alloc] initWithVertexShaderByteArray:lightBlur_vert
    fragmentShaderByteArray:lightBlur_frag];

    [shaderProgram addAttribute:kCCAttributeNamePosition index:kCCVertexAttrib_Position];
    [shaderProgram addAttribute:kCCAttributeNameColor index:kCCVertexAttrib_Color];
    [shaderProgram addAttribute:kCCAttributeNameTexCoord index:kCCVertexAttrib_TexCoords];

    [shaderProgram link];
    [shaderProgram updateUniforms];

    [[CCShaderCache sharedShaderCache] addProgram:shaderProgram forKey:@"BlurShader"];

    CHECK_GL_ERROR_DEBUG();

    [shaderProgram release];
    shaderProgram = nil;
}
The vertex shader has a lighter workload than the fragment shader, so i pre-multiplied the v_fragmentColor by 0.5 since i’m going to be averaging 2 values in the fragment shader and this saves a multiply operation in the fragment shader.
const GLchar *lightBlur_vert =
"attribute vec4 a_position; \n\
attribute vec2 a_texCoord; \n\
attribute vec4 a_color; \n\
\n\
uniform mat4 u_MVPMatrix; \n\
\n\
varying lowp vec4 v_fragmentColor; \n\
varying lowp vec2 v_texCoord; \n\
varying lowp vec2 v_textCoordL; \n\
varying lowp vec2 v_textCoordR; \n\
\n\
void main(){ \n\
gl_Position = u_MVPMatrix * a_position; \n\
// premul the frag color -- based on number of components added \n\
v_fragmentColor = a_color * 0.5; \n\
v_texCoord = a_texCoord; \n\
v_textCoordL = vec2(a_texCoord.x-0.00390625, a_texCoord.y); \n\
v_textCoordR = vec2(a_texCoord.x+0.00390625, a_texCoord.y); \n\
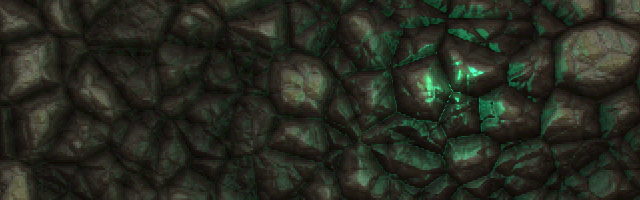
}";Note, the 0.00390625 magic number is the texel size for my texture sheet. Texel sizes are calculated as 1/texture size, so in this case it’s 1/256. This value can be passed as a uniform to the shader if there are different texture sizes being used. I’ve hardcoded mine in the above example, which I’m sure will come back to bite me in the future when I change texture sizes (12/12/2013 UPDATE: It did!!).
For the 2D CCSpriteBatchNode, the fragment shader is the most taxing on the hardware. For this Blur Shader to work and not produce any visual artifacts, I needed to ensure that if the source pixel (v_textCoord) had a zero alpha value, that the end result was zero for the r,g,b,a values. One of the first iterations had an if/else branch on the alpha value, where if the pixel was alpha=0.0 that that fragment was set to all zeros. While this saved some computations, it left the parallel fragment shader underutilized and caused framerate issues.
Per Apple’s best practices for shaders (link at bottom), all branching / loops / etc should be avoided whenever possible. Thus, I learned that it’s better to do the calculations even if they are thrown away at the last step by multiplying by zero. Here is the fragment shader I ended up using:
const GLchar *lightBlur_frag =
"varying lowp vec4 v_fragmentColor; \n\
varying lowp vec2 v_texCoord; \n\
varying lowp vec2 v_textCoordL; \n\
varying lowp vec2 v_textCoordR; \n\
uniform sampler2D u_texture; \n\
\n\
void main(){ \n\
    // read the target pixel as fragColor \n\
    lowp vec4 fragColor = texture2D(u_texture, v_texCoord); \n\
    \n\
    // take a left / right sample, and use whichever one is greater \n\
    lowp vec4 fragBlur = max(texture2D(u_texture, v_textCoordL), texture2D(u_texture, v_textCoordR)); \n\
    \n\
    // results in 0 if original fragColor.alpha is 0 \n\
    gl_FragColor = v_fragmentColor * (fragColor.a * (fragColor + fragBlur)); \n\
}";
The fragment color is mixed with the pixel to the left or right that had the highest value. The reason for the max operation is that the pixels on the edge of the tile that were bordered by a transparent pixel needed to be averaged with a value that was not transparent. Since one of the neighboring pixels in my particular tile texture sheet would always have values greater than zero, the max operation was the simplest way to achieve a blur with very few operations.
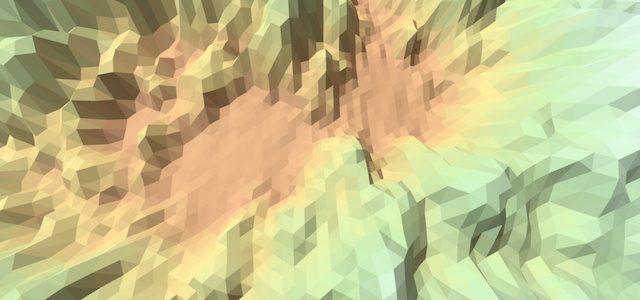
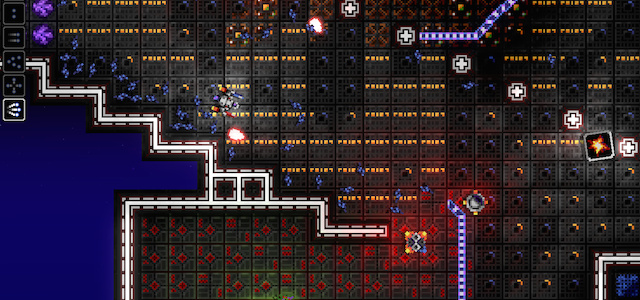
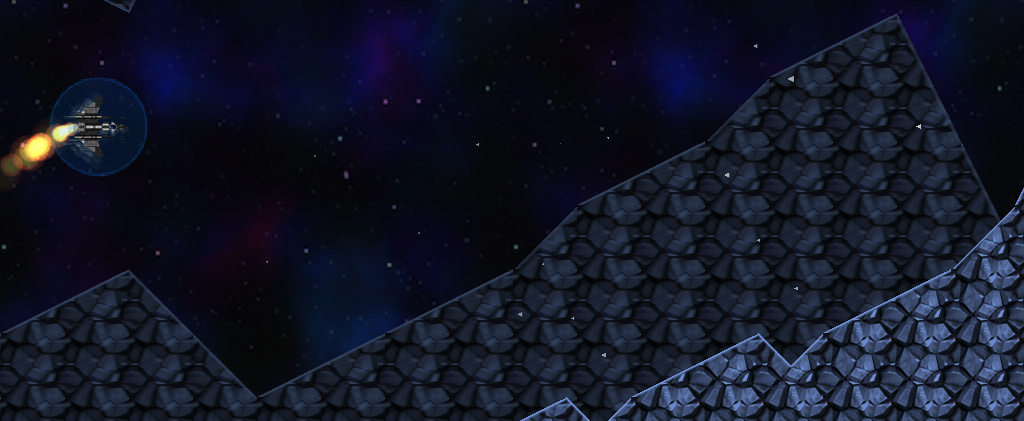
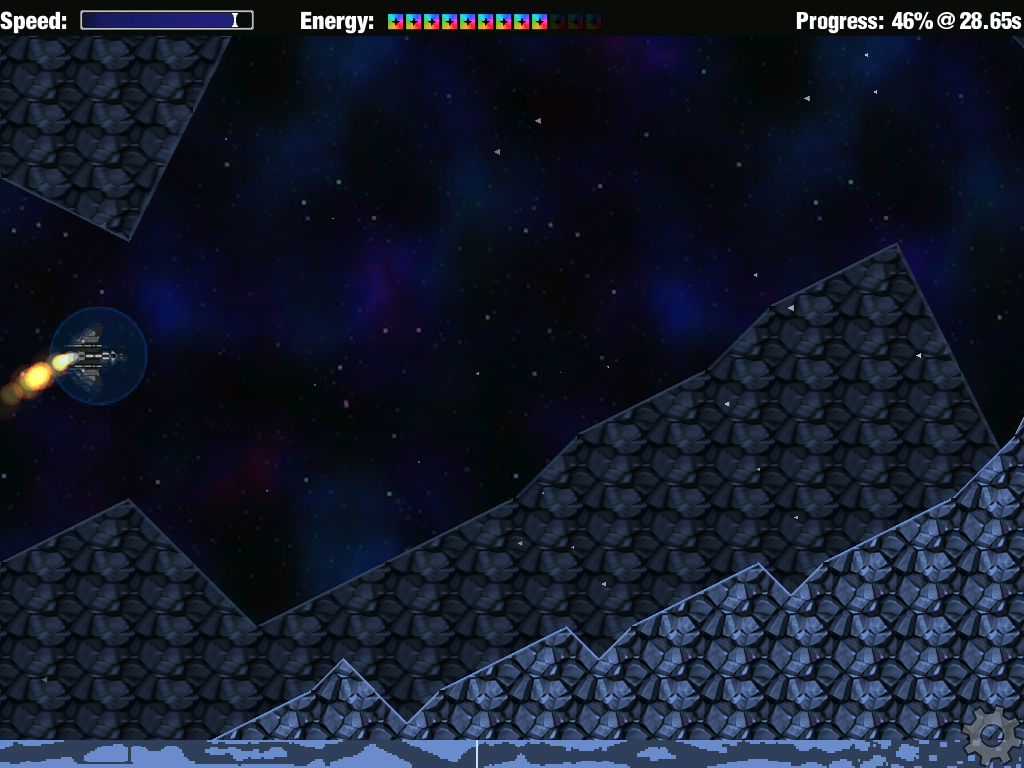
Due to the CPU/GPU capacity of the retina iPad3,1, this isn’t exactly the blur shader that I set out to write, but the end result achieves a subtle blur on the background layer and doesn’t drop the frame rate below 60fps. I’ll take that as a win over shader code for now. Here is an example of the final result:
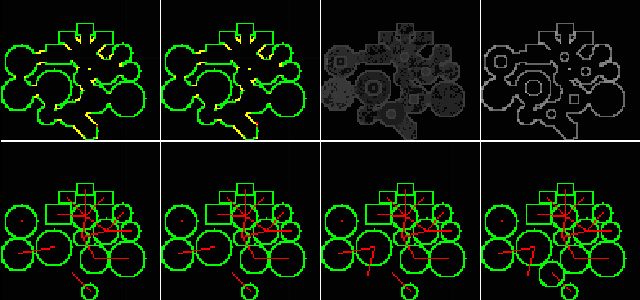
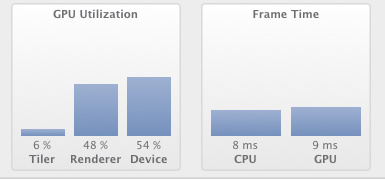
The following are performance measurements from a particular heavy section of the game on an iPad 3,1. The difference between the non-optimized shader and the final shader is that the final shader has one less MIN operation and one less swizzle operation.
Default Shader performance on iPad3,1:
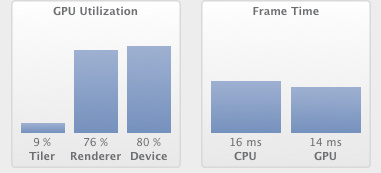
Non-Optimized Shader performance on iPad3,1:
Final Shader performance on iPad3,1:
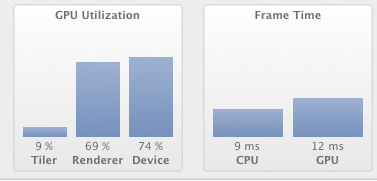
With the Final Shader in place, the frame rate is still a solid 60fps and very smooth on an iPad3,1+.
Here are a few links on shaders that i found helpful:
-
iOS Benchmarks - I found these benchmarks interesting as an overall metric, since they mostly mirror my experiences with testing Trisector on the devices
-
iOS device shader best practices - Note, the best practices indicate that a swizzle operation on a lowp variable is more expensive than a swizzle on a mediump variable, but in my tests of the final fragment shader above, the lowp variables resulted in the better performance over mediump variables.
-
Also see my article on implementing a Dynamic Lighting Shader with Cocos2d v2.0 and CCSpriteBatchNode
Hope you found this article on Blur Shaders interesting,
Jesse from Smash/Riot