Unity Pro Image Effects with Futile
How to use Unity Pro Image Effects with Futile
This article will discuss how to add and configure an Image Effect in Unity Pro to a Futile Camera GameObject in code.
Find and configure an Image Effect
Start your game in Unity and get to a spot where you would like to add an Image Effect. Pause the game, and in the Hierarchy tab, select the Futile GameObject and then the Camera GameObject. Here I’m going to add a Bloom Image Effect to the main Futile Camera.
Select Add Component -> Image Effects -> Bloom and Glow -> Bloom, which will add a Bloom component to the Futile Camera for your game. Now tweak the settings as you like and take a screenshot of the settings since they will be used later when configuring the Bloom Image Effect in code.

Add the Image Effect to the Futile Camera in Code
Since every GameObject off of the root Futile GameObject is created during runtime, you need to add the Image Effect in code so the effect is used every time your game is played.
First, find the corresponding Image Effect source file in your project’s source (click the gear on the Bloom component in the inspector and choose edit). Alternatively, in the example above we are using Bloom and the corresponding source file is Bloom.js, which should be in your project’s main source directory:
../Assets/Standard\ Assets/Image\ Effects\ \(Pro\ Only\)/Open up Bloom.js, the name of the Image Effect component is indicated on one of the first few lines, which confirms this is the correct Image Effect file:
@script AddComponentMenu ("Image Effects/Bloom and Glow/Bloom")Once the correct Image Effect is located, need to gather a little more information before it may be added in code. Open up the Image Effect file again (Bloom.js) and copy all of the public variables, which correspond to all of the configurable parameters in the Unity inspector and a few hidden shader parameters.
public var tweakMode : TweakMode = 0;
public var screenBlendMode : BloomScreenBlendMode = BloomScreenBlendMode.Add;

public var hdr : HDRBloomMode = HDRBloomMode.Auto;
public var sepBlurSpread : float = 2.5f;

public var quality : BloomQuality = BloomQuality.High;

public var bloomIntensity : float = 0.5f;
public var bloomThreshhold : float = 0.5f;
public var bloomThreshholdColor : Color = Color.white;
public var bloomBlurIterations : int = 2;

public var hollywoodFlareBlurIterations : int = 2;
public var flareRotation : float = 0.0f;
public var lensflareMode : LensFlareStyle = 1;
public var hollyStretchWidth : float = 2.5f;
public var lensflareIntensity : float = 0.0f;
public var lensflareThreshhold : float = 0.3f;
public var lensFlareSaturation : float = 0.75f;
public var flareColorA : Color = Color (0.4f, 0.4f, 0.8f, 0.75f);
public var flareColorB : Color = Color (0.4f, 0.8f, 0.8f, 0.75f);
public var flareColorC : Color = Color (0.8f, 0.4f, 0.8f, 0.75f);
public var flareColorD : Color = Color (0.8f, 0.4f, 0.0f, 0.75f);
public var blurWidth : float = 1.0f;
public var lensFlareVignetteMask : Texture2D;

public var lensFlareShader : Shader;

public var screenBlendShader : Shader;

public var blurAndFlaresShader: Shader;

public var brightPassFilterShader : Shader;Be sure to make note of any enums in the Image Effect, which will be used later in the Image Effect configuration:.
enum LensFlareStyle {
    Ghosting = 0,
    Anamorphic = 1,
    Combined = 2,
}

enum TweakMode {
    Basic = 0,
    Complex = 1,
}

enum HDRBloomMode {
    Auto = 0,
    On = 1,
    Off = 2,
}

enum BloomScreenBlendMode {
    Screen = 0,
    Add = 1,
}

enum BloomQuality {
    Cheap = 0,
    High = 1,
}
Next, scroll down in the Image Effect source and find the CheckResources() function. Modify that function with a few Debug.Log statements to sniff out the individual shaders that are utilized in this Image Effect.
function CheckResources () : boolean {
    CheckSupport (false);

    screenBlend = CheckShaderAndCreateMaterial (screenBlendShader, screenBlend);
    lensFlareMaterial = CheckShaderAndCreateMaterial(lensFlareShader,lensFlareMaterial);
    blurAndFlaresMaterial = CheckShaderAndCreateMaterial (blurAndFlaresShader, blurAndFlaresMaterial);
    brightPassFilterMaterial = CheckShaderAndCreateMaterial(brightPassFilterShader, brightPassFilterMaterial);

    // Added these debug statements to quickly figure the shader values out.
    Debug.Log("screenBlend = " + screenBlendShader);
    Debug.Log("lensFlareMaterial = " + lensFlareShader);
    Debug.Log("blurAndFlaresMaterial = " + blurAndFlaresShader);
    Debug.Log("brightPassFilterMaterial = " + brightPassFilterShader);
    ...
Now, run your game in the Unity editor again, and re-add the same Image Effect component to the Futile Camera. You will see a few debug messages indicating the shaders used:
screenBlend = Hidden/BlendForBloom (UnityEngine.Shader)
lensFlareMaterial = Hidden/LensFlareCreate (UnityEngine.Shader)
blurAndFlaresMaterial = Hidden/BlurAndFlares (UnityEngine.Shader)
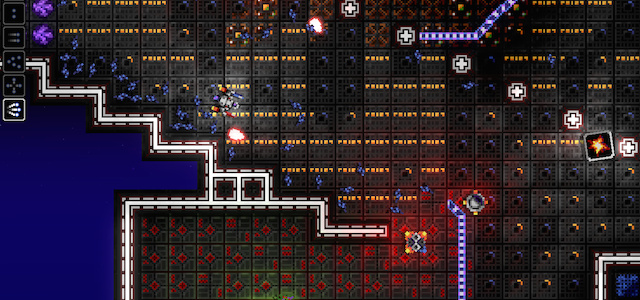
brightPassFilterMaterial = Hidden/BrightPassFilter2 (UnityEngine.Shader)Using the screenshot of the Bloom settings from earlier, the Bloom Image Effect may now be added to the Futile Camera in code. Here is a full example of the code used to add a Bloom Image Effect in Dr. Spacezoo:
// The component name is the Image Effect name.
Bloom bloom = Futile.instance.camera.gameObject.AddComponent<Bloom>();

// configure the shaders used by this Image effect
bloom.lensFlareShader = Shader.Find("Hidden/LensFlareCreate");  		// ../Shaders/_BloomAndFlares/LensFlareCreate.shader
bloom.screenBlendShader = Shader.Find("Hidden/BlendForBloom"); 			// ../Shaders/_BloomAndFlares/BlendForBloom.shader
bloom.blurAndFlaresShader = Shader.Find("Hidden/BlurAndFlares");		// ../Shaders/_BloomAndFlares/BlurAndFlares.shader
bloom.brightPassFilterShader = Shader.Find("Hidden/BrightPassFilter2");	// ../Shaders/_BloomAndFlares/BrightPassFilter2.shader

// bloom parameters
bloom.tweakMode = Bloom.TweakMode.Complex; // shows the full options in the inspector
bloom.screenBlendMode = Bloom.BloomScreenBlendMode.Add;
bloom.hdr = Bloom.HDRBloomMode.On;
bloom.bloomIntensity = 10;
bloom.bloomThreshhold = 0.82f;
bloom.bloomBlurIterations = 4;
bloom.blurWidth = 3.5f;  // Sample Dist

// flare parameters
bloom.lensflareMode = Bloom.LensFlareStyle.Anamorphic;
bloom.lensflareIntensity = 1;
bloom.lensflareThreshhold = 0.0f;
bloom.hollyStretchWidth = 0.75f;
bloom.hollywoodFlareBlurIterations = 1;
bloom.lensFlareSaturation = 0.25f;
bloom.flareColorA = new Color (0.35f, 0.49f, 0.81f, 1.0f); // 89, 125, 206
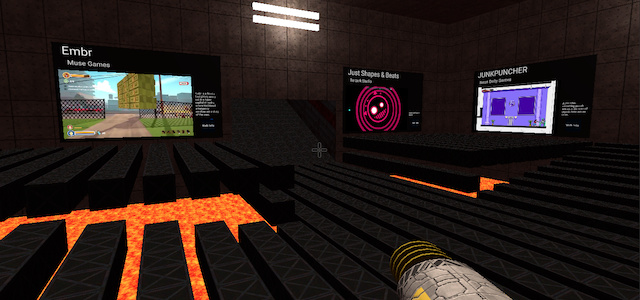
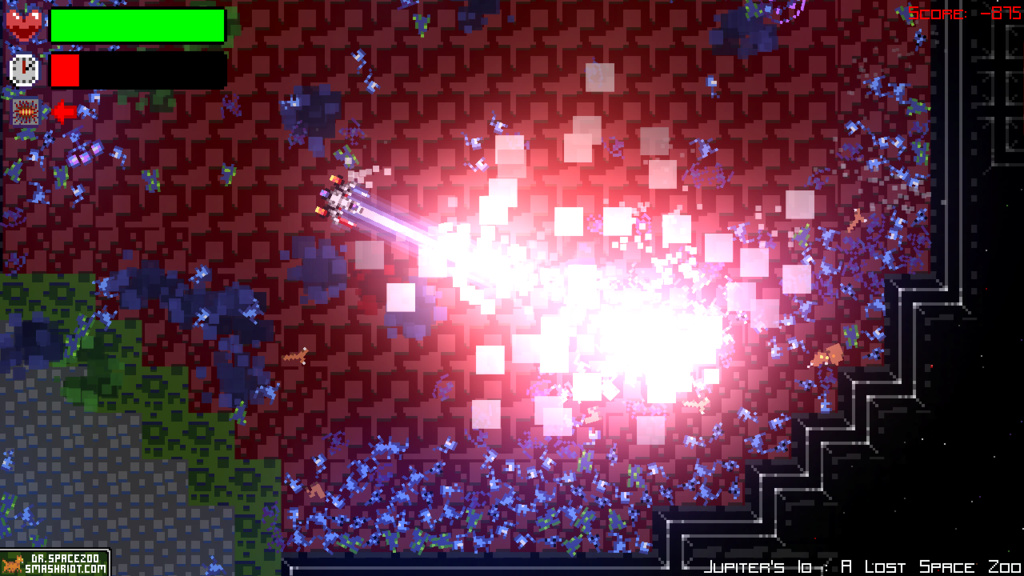
Which when run, looks like this in Unity (click image for fullsize):

And here is how you remove the Bloom Image Effect component from the Futile Camera in code:
// remove bloom
Futile.Destroy(Futile.instance.camera.gameObject.GetComponent<Bloom>());
Now the Image Effect should be working great in the Unity editor. One last task for proper publishing of the game with the Image Effect is to add (and SAVE) the individual shader files to the Unity Project settings.
In Unity with the game stopped, click on Edit->Project Settings->Graphics and indicate the individual shaders that were used above. For example, the Bloom Image Effect uses 4 shaders, which means in addition to the default Diffuse shader, need to add 4 more:

Click the eyeball icon next to each shader field and select the corresponding shader in the big list of Unity shaders.
Hidden/BlendForBloom
Hidden/LensFlareCreate
Hidden/BlurAndFlares
Hidden/BrightPassFilter2
Be sure to SAVE your project after adding these shaders to the Graphics settings. Now your Image Effect will work in the standalone and web builds! If you notice that the standalone/web build isn’t using the Image Effect, the most likely cause is that all of the shaders are not added to the project’s Graphics configuration.
One additional caveat to be aware of is that if you add an Image Effect to the Futile Camera, be sure to clean it up as needed. For example, in Dr. Spacezoo, the Image Effects are added to the main Futile Camera during level load, the values of the Image Effect are slightly tweaked during game play, and the Image Effect is removed on level cleanup. This ensures that the level always restarts with the Image Effect in the proper state.
Image Effect Platform differences with Direct3D
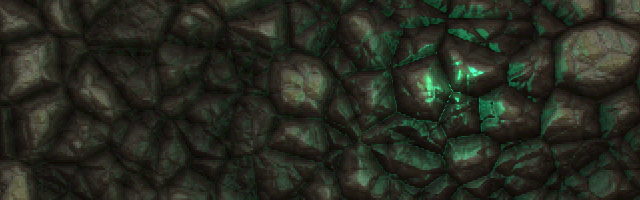
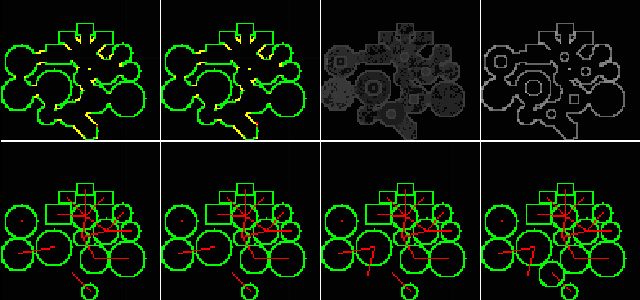
One source of frustration was getting a particular Image Effect (Fast Bloom) completely dialed in, only to test it on Windows and see it look like this:

Notice that the Bloom effect is flipped from the normal screen orientation. This flip happens because Direct3D uses a different coordinate system from OpenGL, and this is one case where Unity does not elegantly and automatically handle the platform differences for you.
The cause of the flip is any Image Effect makes use of Anti-Aliasing, as discussed in Unity’s Platform Specific Rendering Differences document:
One case where this does not happen, is when Image Effects and Anti-Aliasing is used. In this case, Unity renders to screen to get anti-aliasing, and then “resolves” rendering into a RenderTexture for further processing with an Image Effect. The resulting source texture for an Image Effect is not flipped upside down on Direct3D (unlike all other Render Textures).
A fix for any Image Effect that uses AA is offered on that page as follows:
// On D3D when AA is used, the main texture and scene depth texture
// will come out in different vertical orientations.
// So flip sampling of the texture when that is the case (main texture
// texel size will have negative Y).

#if UNITY_UV_STARTS_AT_TOP
if (_MainTex_TexelSize.y < 0)
        uv.y = 1-uv.y;

#endif
In the case of Fast Bloom, which uses the MobileBloom.shader file, this fix is already applied in the shader file:
/Assets/Standard\ Assets/Image\ Effects\ \(Pro\ Only\)/_Sources/Shaders/_BloomAndFlares/MobileBloom.shaderHowever, if you use Futile’s ScreenToWorldPoint(Input.mousePosition) function to get the mouse cursor position on screen, it is going to be flipped as well. A simple fix for Futile’s ScreenToWorldPoint()’s mouse coordinate flip in is to subtract the mouse position from ccreen height when on a Windows platform:
Vector3 mousePos;

// fix for D3D and AA Image Effect flip:
if (Application.platform == RuntimePlatform.WindowsPlayer ||
    Application.platform == RuntimePlatform.WindowsWebPlayer ||
    Application.platform == RuntimePlatform.WindowsEditor){

    mousePos = Futile.instance.camera.ScreenToWorldPoint(Screen.height - Input.mousePosition);
}
// normal rendering, carry on
else {
    mousePos = Futile.instance.camera.ScreenToWorldPoint(Input.mousePosition);
}
The Image Effect’s shader fix and mouse coordinate fix mostly resolve the issues with Windows platform, as long as you can live with the level orientation and sprites still being flipped during game play.
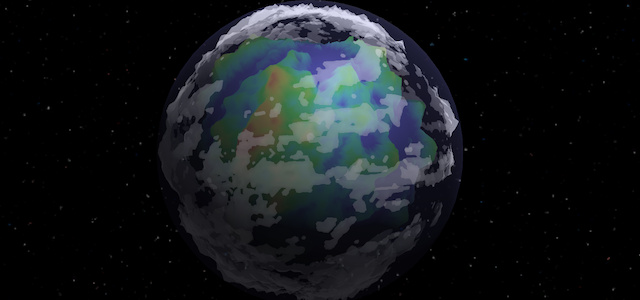
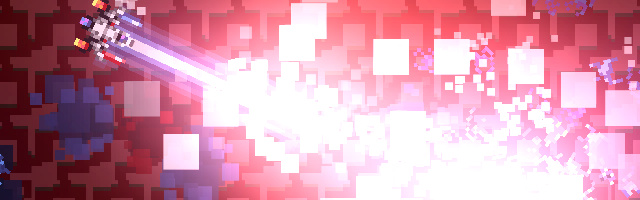
Here’s an example of normal rendering with Fast Bloom on OS X and the y-flipped D3D rendering on Windows:
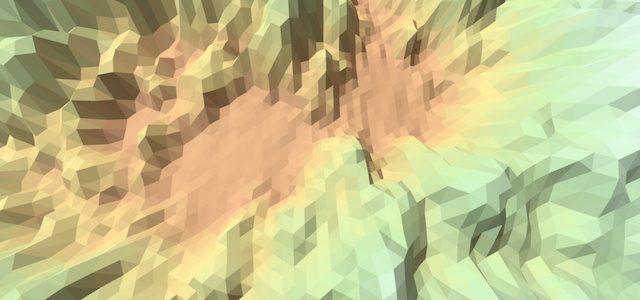
OS X - Normal Fast Bloom Rendering:

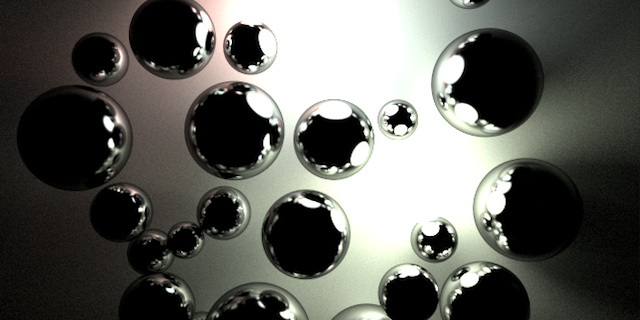
Windows - Flipped Fast Bloom Rendering:

2014/10/11 Update: The image flip turned out to be a Unity Bug #633649 fixed in Patch 4.5.4p2!
In the end, I resolved the flip rendering issue by replacing Fast Bloom with Bloom, which doesn’t use an AA operation and renders the same on all platforms.
More information on Futile, a code-centric 2D framework for Unity, may be found here: struct.ca/futile/
Hope you found this article on using Unity Pro’s Image Effects with Futile interesting,
Jesse from Smash/Riot