Making of Trisector: Maps
The process of making the maps for Trisector
Trisector uses tile maps for the levels, and each level’s tile map includes a Background, a Base layer, a Collision layer, and an Object layer. This article will talk about the design, creation and structure of the levels and the tile maps.
While learning Objective C, my first project was an RPG engine that used tile maps for the world maps. The RPG engine was fairly complete (at least for a first feature pass), but was eventually scrapped due to the high art requirements. One thing that was mostly salvaged from the RPG project was the tile based rendering engine which was used in early Trisector builds. However, most of the original code and structure of that tile engine was heavily refactored for performance reasons and no longer reflects that original RPG engine.
All of the levels in Trisector are tile maps created using the Tiled map editor. Tiled allowed for the maps to have multiple tile and object layers, and Trisector uses two tile layers (Collision and Base), and one object layer (Objects). The Collision tile layer corresponds to the foreground layer, and the Base tile layer corresponds to the background layer. Generally the maps are 15 tiles high and between 200-600 tiles wide.
Trisector has 3 Training levels, and 9 Story levels. The purpose of the first Training level was to ease the player into the important mechanics of the game. The second Training level was designed to introduce the player to the hostile enemies and some of the offensive and defensive strategies. The third training level was a short level with a lot of power-ups and wide corridors that was more representative of the Story levels.
The Story levels are loosely grouped together based on shared color schemes. [Begin light spoilers] The first and second levels cover the exploration of the Tri-Corp mining operations and are blue tinted. The third and fourth levels cover the Tri-Corp refinement operations and are brown tinted. The fifth and sixth levels cover the atmosphere and surface on a Tri-Corp manufacturing planet and are yellow-brown and blue tinted, respectively. The seventh level covers the Tri-Corp core operations and is steel tinted. The eighth level covers the destruction of the Tri-Corp operations and is blue tinted. The ninth level is the final bullet filled escape from the Tri-Corp and is blue-gray tinted. [End light spoilers]
The early levels have wide corridors and few enemies, whereas the later levels have more technical corridors and tons more enemies (and bullets). The enemies in the early levels shoot a lot less than those in the later levels, and typically don’t fire the player tracking projectiles. The later levels are bullet filled with numerous enemies that are sure to cause trouble if they are not quickly destroyed. Most enemies will path through the whole level, so it’s a good idea to destroy them as early as possible.
Here’s the breakdown of levels for the v1.0.0 (160) release of Trisector:
| Level # | # Enemies | # Powerups* | # Tiles Long |
| Level 1 | 26 | 8 | 400 |
| Level 2 | 14 | 11 | 400 |
| Level 3 | 36 | 35 | 400 |
| Level 4 | 23 | 11 | 400 |
| Level 5 | 48 | 20 | 500 |
| Level 6 | 42 | 32 | 400 |
| Level 7 | 62 | 21 | 400 |
| Level 8 | 75 | 44 | 600 |
| Level 9 | 80 | 40 | 600 |
| * includes: Energy, Shield, Spread, Quad, & Burst | |||
Each map has several different layers, that include a Background layer, a Base layer, a Collision layer, and an Object layer. The bottom layer is called the Base layer. The scroll speed of the Base layer is 65% of the Collision and Object layers. In order to get features of the Base layer to match up with the other layers, the position of a feature in the Collision or Object layer was multiplied by 0.65, which resulted in an approximate Base layer position.
For example, if there was a pillar starting at tile 100 in the Collision layer, a similar pillar could be placed at tile 65 in the Base layer in order to appear in game at the same position. Also, if the pillar was 5 tiles with in the Collision layer, then the corresponding pillar would be 4 tiles wide in the Base layer to provide some depth of field.
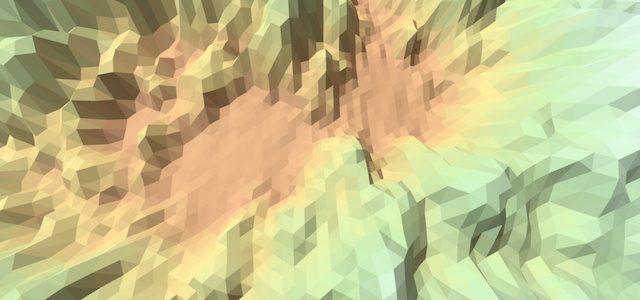
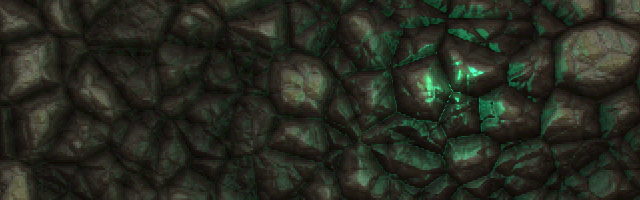
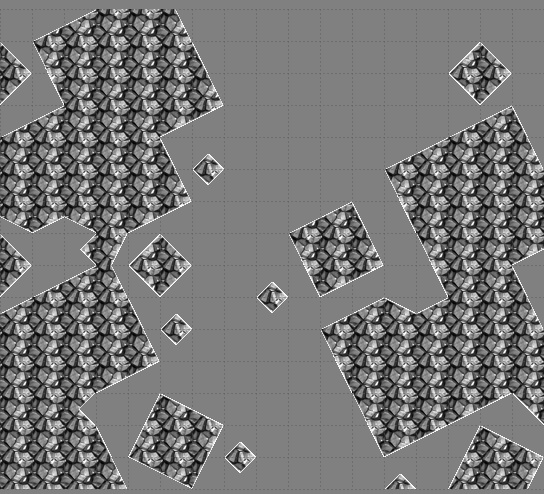
Here’s a view of the Base layer for Level 9 in the Tiled editor starting around tile column 115:
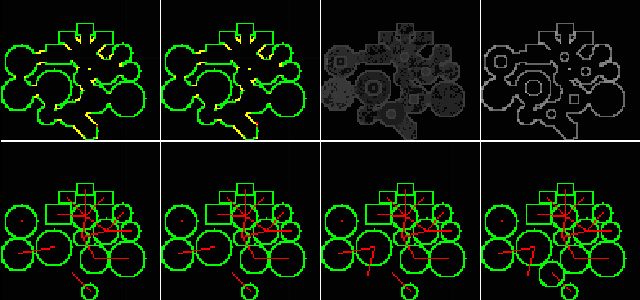
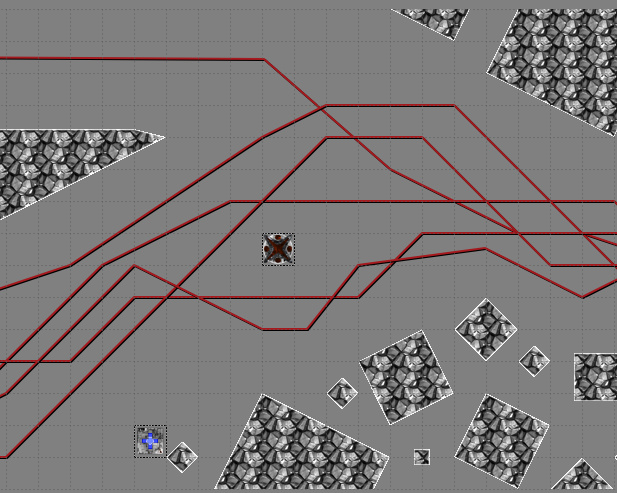
And here’s a view of the Collision and Object layers for Level 9 in the Tiled editor starting around tile column 176. Note, the red lines are the enemy movement paths:
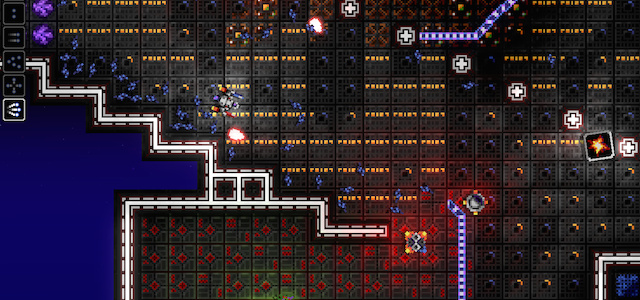
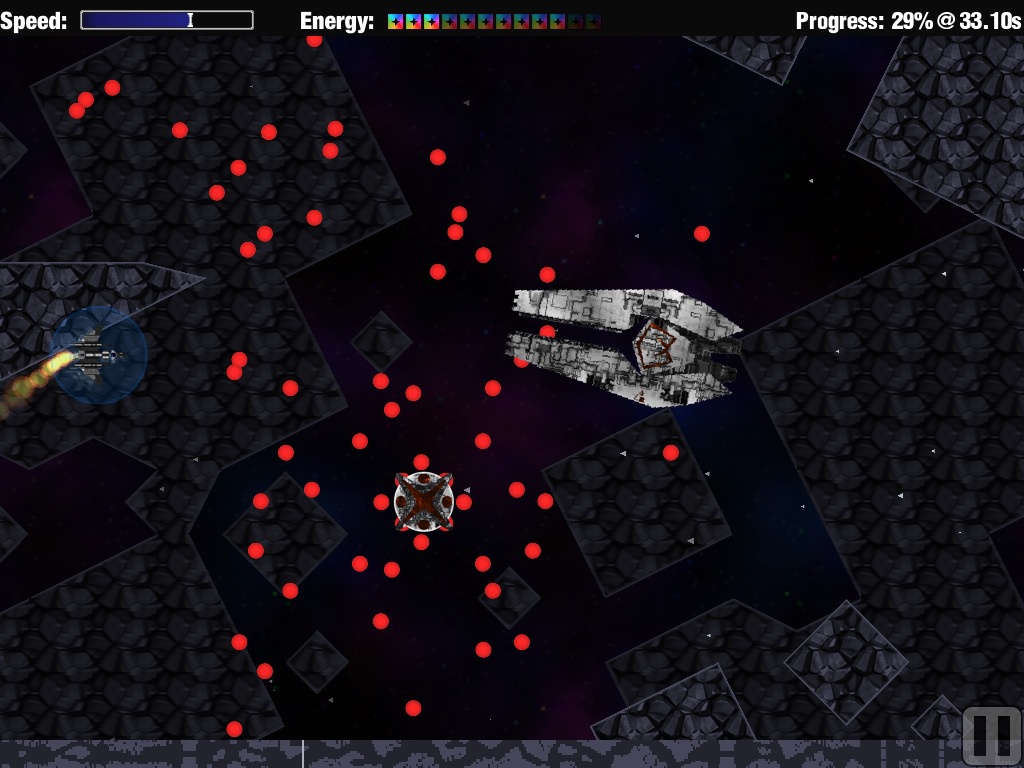
And here is what all of the layers look like together in the game:
The level maps and the layers had a few properties that define various aspects of the map. For example, each map includes Color and Background properties. The Background property specifies the image file to use for the background in the level. The Color property specifies the color to tint the Background, and usually has the RGB values of 125:125:125.
Each tile layer also includes a Color property which is used to tint the gray rock tiles the proper color for the level. For example, Level 9 (shown above) uses RGB values 70:70:90 for the Collision Layer’s Color property, and RGB values 35:35:45 for the Base Layer’s Color property.
The Object layer holds all of the in game objects such as enemies, enemy paths, and power-up objects. Each object in the Object layer has a type and an associated tile. The object tile shown in the tiled editor is a placeholder and may not match the final tile configuration in the engine. For example, the Assault Fighter is shown as a single 1x1 tile sprite in the editor, but is actually a 2x2 tile sprite in the game.
The power-ups don’t have any properties besides type:
- PowerupBoostPlus
- PowerupBoost
- PowerupDragMinus
- PowerupDrag
- PowerupEnergy
- PowerupShield
- PowerupBurst
- PowerupQuadLaser
- PowerupSpreadLaser
Example of a power-up object in the map file:
<object type="PowerupEnergy" gid="59" x="128" y="256"/>The message objects trigger a display of a message on the screen. The messages seen on the tutorial levels are of the type MessageHidden, and the story nodes that display text over the mini map are of the type MessagePopup. Each message object may have a few different properties:
- Message - message to display
- VoiceOver - voice over file ID (currently unused)
- Node - a unique story node sequence number for that level (e.g. 0,1,2..N)
The enemy objects have a different object type for each, and included a default set of properties. The enemy objects include the types:
- EnemyFuel
- EnemyDestructable
- EnemySpaceman
- EnemyDefenseStar
- EnemyFighter
- EnemyAssaultFighter
- EnemyDestroyer
- EnemyMovement
Additionally, each enemy type had a default set of properties mat be overwritten per object by including additional properties:
- Name - The name for the object is a descriptive name, unless the name is tied to a EnemyMovement object, in which the Enemy object name and EnemyMovement name will match (e.g. 1).
- HitPoints - Number of hits to destroy the enemy.
- MovementType - None, Path, UpDown, DiagUp, DiagDown, Flee, Evade
- MovementID (via ObjectName) - If MovementType is set to Path, then the corresponding EnemyObj will follow the path indicated via the corresponding EnemyMovement object
- MovementBoostAvailable - True if the enemy will boost away if the player gets to close. False will allow the enemy to be overtaken
- MaxProjectiles - Maximum number of projectiles on screen at once
- ProjectileScale - The scale of the projectiles (Default is 0.5)
- FiringDistance - Distance the projectiles can travel before being removed
- FiringInterval - Time between each new set of projectiles
- FirePlayer - True/False on if the enemy fires at the player position
- FireN - True/False on if the enemy fires to the north
- FireNE - True/False on if the enemy fires to the north east
- FireE - True/False on if the enemy fires to the east
- FireSE - True/False on if the enemy fires to the south east
- FireS - True/False on if the enemy fires to the south
- FireSW - True/False on if the enemy fires to the south west
- FireW - True/False on if the enemy fires to the west
- FireNW - True/False on if the enemy fires to the north west
The following are a few examples of some enemy objects in the map file:
<object name="Diag" type="EnemyDefenseStar" gid="76" x="384" y="224">
 <properties>
  <property name="FireE" value="0"/>
  <property name="FireN" value="0"/>
  <property name="FirePlayer" value="0"/>
  <property name="FireS" value="0"/>
  <property name="FireW" value="0"/>
 </properties>
</object>

<object name="Assult Fighter Spread" type="EnemyAssaultFighter" gid="78" x="448" y="288">
 <properties>
  <property name="FireN" value="1"/>
  <property name="FireNW" value="1"/>
  <property name="FireS" value="1"/>
  <property name="FireSW" value="1"/>
 </properties>
</object>
The following is an EnemyFighter object and a corresponding EnemyMovement object. The EnemyMovement will set the EnemyFighter to MovementType=Path when created. The caveats associated with the EnemyMovement type is that the EnemyMovement must occur in the map file’s XML after the corresponding EnemyFighter is defined, and the set of Object Names must be unique for that pair.
<object name="1" type="EnemyFighter" gid="77" x="6368" y="64">
 <properties>
  <property name="FirePlayer" value="0"/>
 </properties>
</object>

<object name="1" type="EnemyMovement" x="6402" y="49">
 <polyline points="0,0 220,0 318,-49 382,-49 638,15 1310,15 1438,-49 1566,15 2270,15 2654,47 2750,-49 2814,-49 2910,15 3262,15 3838,15 4336,48 4446,-49 4734,-17 4670,-177 4286,-177 4286,-17"/>
</object>
The tile map data for each tile layer is base64 encoded with zlib compression. The following is a Base layer example from a test map file:
<layer name="Base" width="48" height="15">
 <properties>
  <property name="Color" value="49:62:91"/>
 </properties>
 <data encoding="base64" compression="zlib">
   eJwTYGBgEKACHihADbcPpPtlgViOCvRAAVUgVqMCPQpGwSgYBaNgaAFeIOajAj1QQBSIxahADxQY6u2foe5+ALaFC60=
 </data>
</layer>
Each level maps was exported as a TMX map. The engine reads and parses each TMX map file via cocos2d’s CCTMXMapInfo methods.
CCTMXMapInfo *tileMap = [CCTMXMapInfo formatWithTMXFile:mapFilename];After reading the map data into a CCTMXMapInfo object, the map dimensions are read and stored:
NSUInteger mapWidth = tileMap.mapSize.width;
NSUInteger mapHeight = tileMap.mapSize.height;
Then, the background image file and color is read, and associated background sprite is created and tinted:
NSString *backgroundImageFile = [[tileMap properties] valueForKey:@"Background"];
NSString *backgroundTint = [[tileMap properties] valueForKey:@"Color"];
Next, the Base and Collision tile layers are read and processed:
// parse the layers
for (CCTMXLayerInfo *layerInfo in tileMap.layers){
    // BASE
    if ([layerInfo.name isEqualToString:@"Base"]){
        [self loadBaseTileMap:layerInfo width:mapWidth height:mapHeight];
    }
    // COLLISION
    else if ([layerInfo.name isEqualToString:@"Collision"]){
        [self loadCollisionTileMap:layerInfo width:mapWidth height:mapHeight];
    }
}
The loadBaseTileMap and loadCollisionTileMap methods are similar to each other in that they create a NSMutableArray with the initial capacity of the map (e.g. mapWidth * mapHeight). Also, the Tint Color property is read for that layer similar to above (e.g. [[tileLayer properties] valueForKey:@“Color”]). Finally, the tiles of the map are iterated in reverse row order since TMX is stored different from how Trisector uses them. The tileGID is stored as a NSNumber into the associated NSMutableArray for that layer:
// need to read the rows in reverse because tmx 0,0 is top left, and map 0,0 is bottom left.
for (int row=(mapHeight - 1); row>=0; row--){
    for (int col=0; col<mapWidth; col++){
        // get tileID
        NSUInteger pos = col + mapWidth * row;
        uint32_t tileGID = tileLayer.tiles[pos];

        // gid are stored in little endian, if host is big endian, then swap
        tileGID = CFSwapInt32LittleToHost( tileGID );

        // tile ID may be -1 if missing/transparent
        NSNumber *tileID = [NSNumber numberWithInt:(tileGID - TILEMAP_FIRST_GID)];
        [baseTiles addObject:tileID];
        tileID = nil;

    } // end col for
} // end row for
Finally, the object layer is read and parsed, and then the various objects are created:
// parse the object groups
for (CCTMXObjectGroup *objectGroup in tileMap.objectGroups){
    if ([objectGroup.groupName isEqual:@"Objects"]){

        NSMutableArray *mapObjects = [tileObjects objects];
        for (NSMutableDictionary *mapObject in mapObjects){ // was string
            NSString *objectName = [mapObject valueForKey:@"name"];
            NSString *objectType = [mapObject valueForKey:@"type"];
            NSUInteger objectX = [[mapObject valueForKey:@"x"] intValue];
            NSUInteger objectY = [[mapObject valueForKey:@"y"] intValue];

            // create object based on objectType and additional properties for that object
            ...
        } // end for
    } // end if
}
Based on the object type, the object’s data is parsed and the object type is created and stored in a NSMutableArray associated with that object type (e.g. power-up, enemy object, enemy movement). One caveat is that the object had to be inserted into the array based on the object’s x-position due to how the engine culls and adds objects. Thus, the object’s insertion position would be determined and then used to insert the object into the proper position within the object’s associated NSMutableArray.
There are a few reasons why I didn’t use cocos2d’s CCTMXMap methods out of the box. First, Trisector adds and removes objects and tiles to the corresponding CCSpriteBatchNode on each major tile tick, which (after much testing and refactoring) was the most efficient way I found to display the various tile layers in the engine. I tried the native CCTMXMap loading and scrolling methods and they were considerably slower than what Trisector ended up using. Further, I tried a handful of different methods for culling and adding tiles and objects to the various scroll layers, and the current implementation reflects the the most efficient method I found.
Since I was using my own methods of managing the sprites in the CCSpriteBatchNode layers, I didn’t need to have CCTMXMap create all of the objects since they would be thrown away after reading the TileIDs. Thus, the above methods of reading the tile and object layers' data are somewhat different from the default CCTMXMap methods.
I’ll discuss the nuts and bolts of how the CCSpriteBatchNode layers are managed in the Making of Trisector: Engine and Improved Tile Culling for CCSpriteBatchNode articles.
Hope you found this article on Trisector’s Maps interesting,
Jesse from Smash/Riot