Making of Trisector: Art
The process of marking the art for Trisector
First off, I’m not a great artist, but I’ve been drawing, sketching, and painting using traditional and digital tools for a long time. One of the limitations of making a game solo is that the game design had to be created within the constraints of my art abilities. This article will explain the process that went into creating the art for Trisector.
Back in the mid 1990s when I was making graphic demos, I spent a lot of time making pixel art in Deluxe Paint IIe. For Trisector, I used more modern tools such as Pixelmator for graphics creation and Filter Forge for texture creation. By using the textures created in Filter Forge with the vector shapes and masks created in Pixelmator, I was able to create all of the art assets used in Trisector.
Originally, I wanted to have Trisector available for all of the iOS devices, which meant having low resolution assets for the non-Retina iPhones, medium resolution assets for the Retina iPhone and non-Retina iPad, and high resolution assets for the Retina iPad. Some napkin math based on the various device resolutions and potential tile sizes led me to choose tile sizes of 32x32 for low resolution, 64x64 for medium resolution, and 128x128 for high resolution. Using the determined tile sizes resulted in the following number of tiles on screen per device:
iPhone: 480x320 @ 32x32 = 15 x 10 tiles
iPhone4: 960x640 @ 64x64 = 15 x 10 tiles
iPhone5: 1136x640 @ 64x64 = 17.75 x 10 tiles
iPad SD: 1024x768 @ 64x64 = 16 x 12 tiles
iPad HD: 2048x1536 @ 128x128 = 16 x 12 tiles
In order to be ready for any future device resolution increases, I created most of the sprites based on a tile size of 512x512. These sprites were then added to a single sprite sheet that was based on a 256x256 tile size.
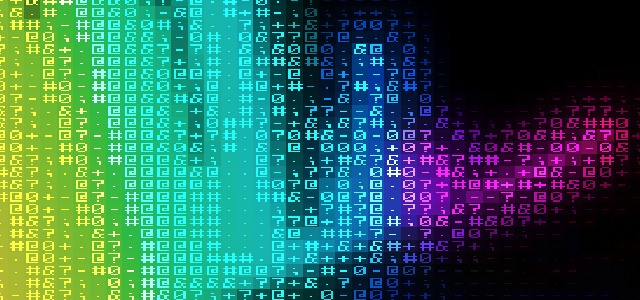
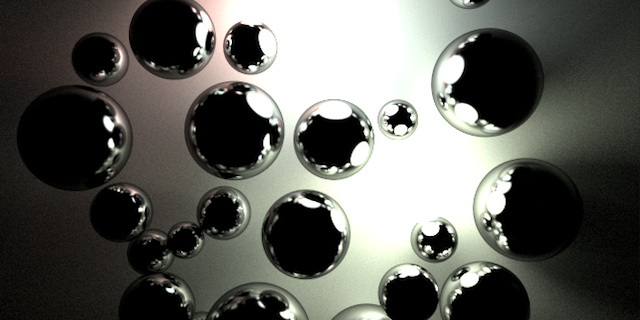
Before I get into creating the actual sprites, I’d like to talk about the texture generation using Filter Forge. Filter Forge has a vast number of texture creation filters, and it was simply a matter of finding a texture that fit the theme of Trisector, tweaking the parameters, enabling seamless tiling, and exporting it as a 512x512 texture. Here’s a picture of the creation of a space texture similar to one used for a background in Trisector:
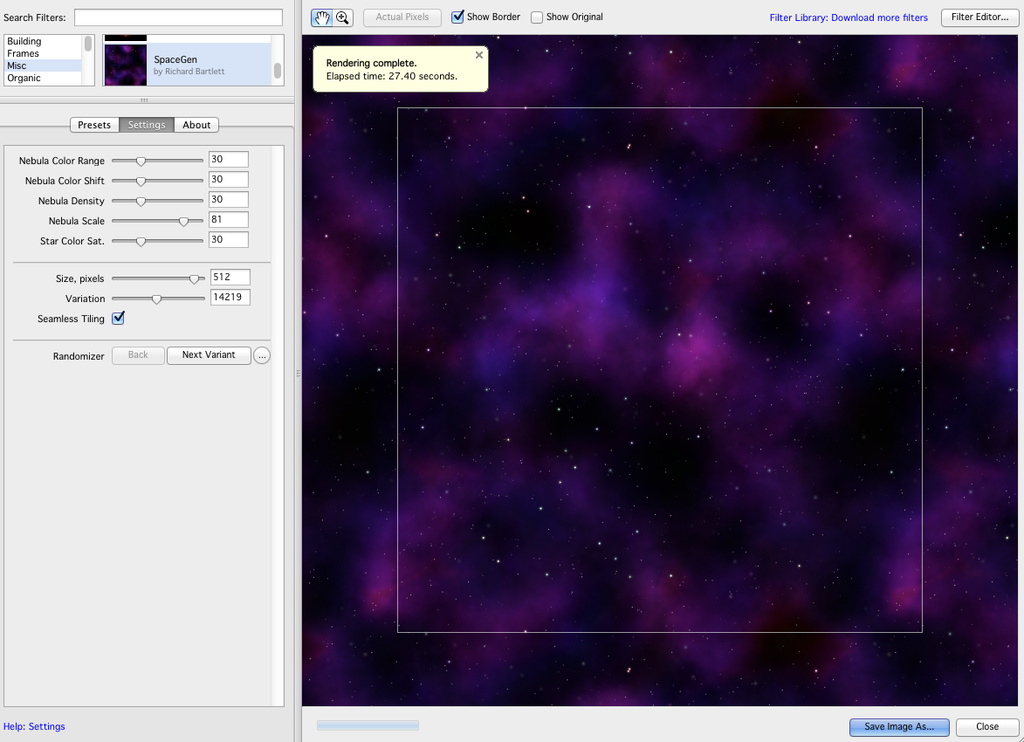
The background layer uses texture sizes of 512x512 for high resolution, 256x256 for med resolution, and 128x128 for low resolution. The tile texture is simply repeated in the background using texture parameters GL_LINEAR,GL_LINEAR,GL_REPEAT,GL_REPEAT. For example:
[objc] backgroundSprite = [CCSprite spriteWithTexture:[[CCTextureCache sharedTextureCache] addImage:backgroundFile] rect:CGRectMake(0, 0, backgroundWidth, backgroundHeight)]; … ccTexParams params = {GL_LINEAR,GL_LINEAR,GL_REPEAT,GL_REPEAT}; [backgroundSprite.texture setTexParameters:¶ms]; [/objc]
The main sprite sheet is broken down into a few sections. Since the major layers (Player, Terrain, Enemies, and Power-ups and Objects) are all in their own CCSpriteBatchNode, there could be a separate sprite sheet for each layer type. However, since I was trying to make a small amount of art assets, all of the art assets were placed into a single sprite sheet that is 8 tiles wide by 16 tiles high. Note, the example below is rotated 90 degrees left for display purposes.
![]()
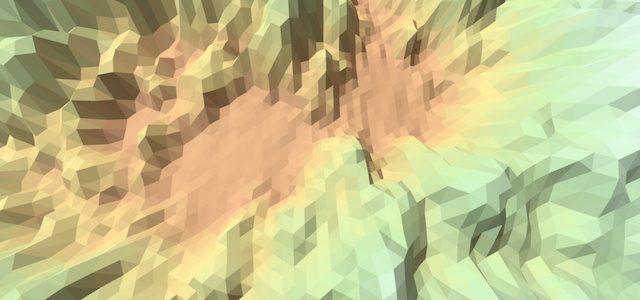
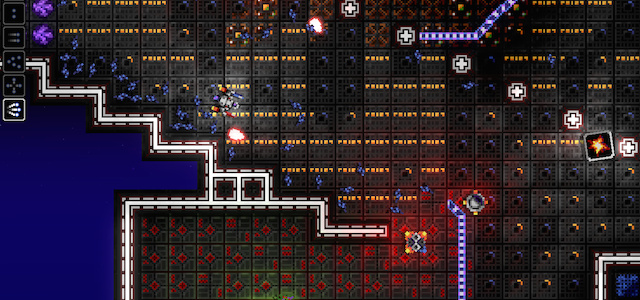
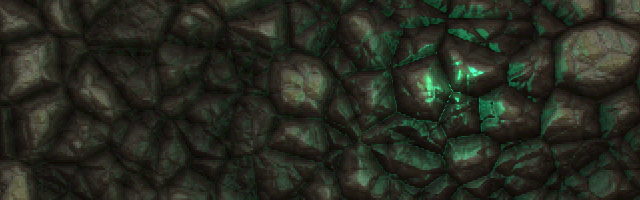
The terrain tiles each use one of the seamless textures from Filter Forge to allow each for the tiles to be seamlessly tiled anywhere in the map. After much experimentation with various textures, I found that the texture needed to be rough and not have too many fine details, which would get lost in the scrolling.
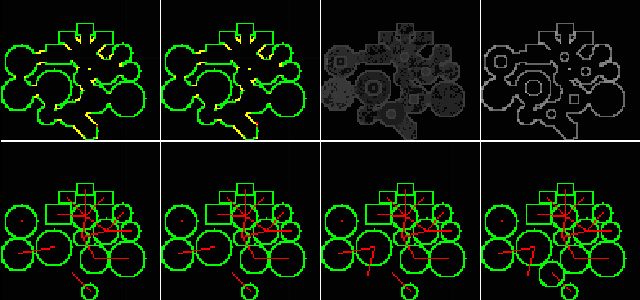
The process of creating the terrain tiles was fairly straightforward. First, a seamless texture was sized to match the tile size and placed in each tile. The first image below shows the tiled rock texture layer for each tile. Next, the shapes for each tile were created as solid shapes in another layer. For the shapes that were similar, I would create one shape, and then rotate it to create the other 3 shapes for that type. Once all of the shapes were created and cleaned up, it was simply a matter of creating a clipping mask using the texture layer, which resulted in the texture being applied to the solid shapes in the shape layer. In addition, each shape had few other layers that provided additional details such as an edge glow to help define the border of each tile.
![]()
The power-ups were designed as simple vector shapes. They were each given a color scheme that corresponded to the power-up type, such as red for weapon power-ups, green for boost power-ups, yellow for drag power-ups, blue for the shield power-up, and rainbow for the energy power-up. Since Trisector moves pretty fast at times, I wanted each icon to be readable at a glance so the power-ups (mostly) used simple shapes.
![]()
The ships were all made using vector shapes with various textures applied to them. There were some pretty rough placeholder ships used during most of the development. It wasn’t until the various enemy ship behaviors were implemented that I took the time to try to create all of the ships for the Tri-Corp fleet.
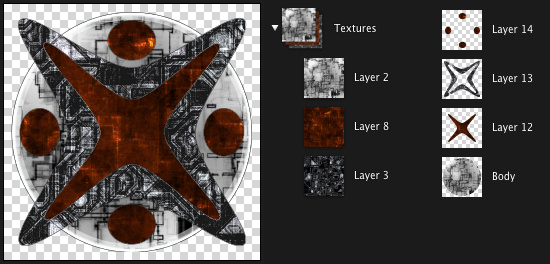
The Tri-Corp fleet took a bit of experimentation to get right. The first step was working in Filter Forge to generate a handful of textures for use on the Tri-Corp fleet. The Tri-Corp fleet ended up using the same three textures, as seen below. Most of the Tri-Corp ships and objects occupy a single tile, but the Assault Fighter and the Destroyer occupy 2x2 tiles and 4x2 tiles, respectively.
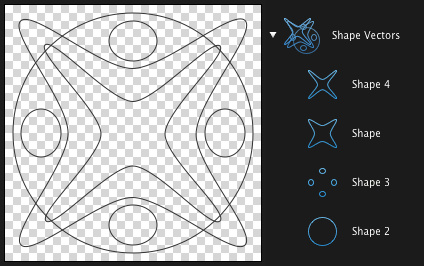
The next step was to construct the ship’s wire frame using the shape vector tools in Pixelmator. The ship vectors included a ship outline and interior shape vectors within this outline. As seen in the picture below, the Tri-Corp Defense Star has a circle for the main body, two center X shapes, and then four circles around the X shapes.
The next step was to flatten the vector layers to pixel layers, and to fill the various structures in with solid colors. The solid colors were then used to create selection masks for those parts.
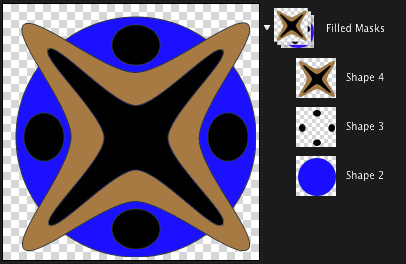
For each solid shape area, a selection mask was created using the Magic Wand tool. Then, the texture layer for that shape was selected, the shape was cut from that layer using the selection mask, and then pasted into a new layer. Then various outlines, glows, and highlights were added to the Defense Star to finish it off:
The player ship was created in mostly the same manner. However, the wire frame used to create the filled shapes only defined the top half of the ship. After the shapes for the top half were textured using the clip masks, the top half was mirrored for the bottom and then a single shape was placed on top for the cockpit. The ship’s shield is a simple vector, and the ship’s lasers and enemy lasers are simple vector shapes filled with a gradient.
Once all of the tiles were created for the terrain, power-ups, enemy ships, player ship, etc., they were all assembled into the final 8x16 sprite sheet shown above. The sprite sheets were exported in various sizes for each of the three resolutions.
Regular iPhone: spritesheet.png - 256x512 Retina iPhone and regular iPad: spritesheet-hd.png - 512x1024 Retina iPad: spritesheet-ipadhd.png - 1024x2048
The resizing created some artifacts that were cleaned up with a smart erase that would remove some of the slightly transparent artifacts. Also, the terrain needed to be duplicated a few times to ensure that all of the remaining pixels were at 100% opacity. The power-ups and ship sprites had somewhat well defined borders that didn’t need much additional cleanup.
Concerning the code to handle the different sprite sheets for different devices, I’m using cocos2d for the underlying toolkit, and it supports automatically loading a graphic file for a device based on a file extension. In Trisector’s App Delegate, I used the following code to indicate the sprite sheet that should be loaded for each device. Note that the regular iPad and Retina iPhones use the same “-hd” sprite sheet.
CCFileUtils *sharedFileUtils = [CCFileUtils sharedFileUtils];
[sharedFileUtils setEnableFallbackSuffixes:NO];				// No Fallback
[sharedFileUtils setiPhoneRetinaDisplaySuffix:@"-hd"];		// -hd assets are used for Retina iPhone
[sharedFileUtils setiPadSuffix:@"-hd"];                     // -hd assets are used for standard iPad
[sharedFileUtils setiPadRetinaDisplaySuffix:@"-ipadhd"];	// -ipadhd are used for Retina iPad
In order to utilize the same code base for all devices, I used the following defines to allow the code to determine the device type and scale that should be used. Cocos2d does some internal scaling, which allowed me to use coordinates based on the non-Retina device resolution.
// ipad / scale functions
#ifdef UI_USER_INTERFACE_IDIOM
#define IS_IPAD() (UI_USER_INTERFACE_IDIOM() == UIUserInterfaceIdiomPad)
#endif
#define IPAD_IPHONE_CONTENT_SCALE (IS_IPAD() ? 2 : 1)

// define tile width / heights
#define TILE_WIDTH (IS_IPAD() ? 64 : 32)
#define TILE_HEIGHT (IS_IPAD() ? 64 : 32)
I simply had to be diligent in using the IPAD_IPHONE_CONTENT_SCALE any time I calculated any type of position or movement vector.
[sprite setPosition:ccp(IPAD_IPHONE_CONTENT_SCALE*position.x, IPAD_IPHONE_CONTENT_SCALE*position.y)];The hardest part of creating the art for Trisector was figuring out the process to create the ships using vector shapes and the textures. All of the ships came together pretty quickly once I had a good process of using a clip mask or smart selection to create a properly textured shape.
Hope you found this article on Trisector’s Art interesting,
Jesse from Smash/Riot